
Tatiana Pupko
This post explores the critical handoff process, a pivotal stage where designers pass their work to developers. This phase is crucial for ensuring developers have all the necessary assets and information to bring the design to life effectively.
Step 1: Exporting Assets
The handoff process begins with exporting assets from Figma. Designers need to provide developers with all the visual elements required for implementation. This includes icons, images, graphics, and any other design components used in the project.

Step 2: Specs & Measurements
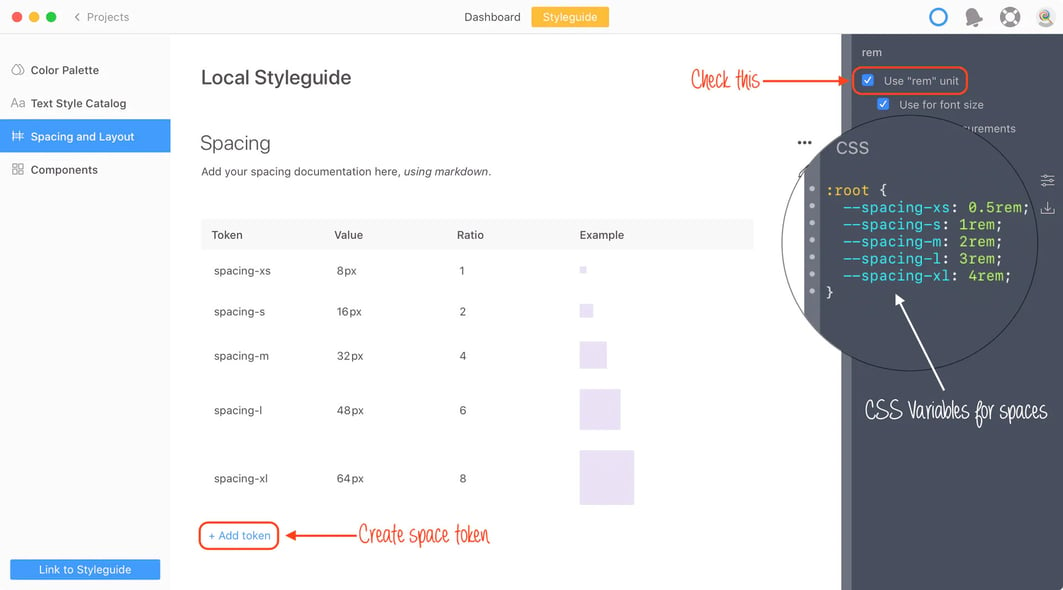
Designers and developers often speak different languages when it comes to design specifications. Figma's 'Inspect' mode comes to the rescue by providing precise details about design elements, including measurements, spacing, colors, and typography.
We'll explore how the 'Inspect' mode works and how designers can accurately convey design specifications. This feature eliminates guesswork, enabling developers to align design elements with pixel-perfect precision during development.
Step 3: Documentation
Effective communication doesn't end with asset handoff. Designers can further assist developers by providing comprehensive documentation accompanying the Figma file. This documentation serves as a reference guide, explaining any design nuances, interactions, or design decisions that might not be immediately apparent.
Well-documented designs empower developers to understand the context behind design choices, resulting in more informed and accurate development.

Step 4: Regular Check-ins
Collaboration doesn't conclude with the handoff. Regular check-ins between designers and developers throughout the development process are crucial. These check-ins provide an opportunity to address questions, provide clarifications, and ensure that the design is being implemented as intended.
Part 4 emphasizes the importance of a well-executed handoff process. It covers asset export, precise specifications, comprehensive documentation, and the value of ongoing communication between designers and developers. A successful handoff ensures the design vision is faithfully realized in the final product.
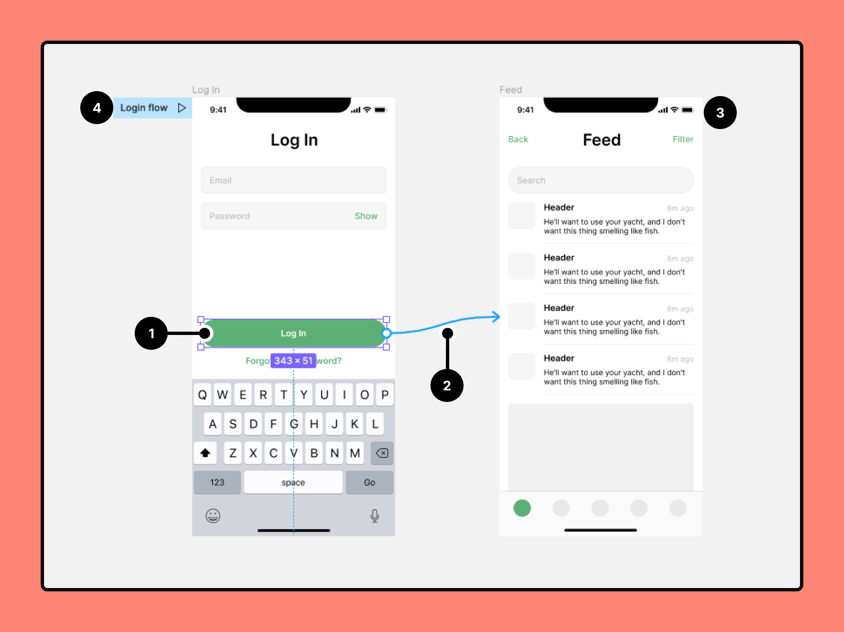
Step 5: Sharing Prototypes
Prototyping within Figma allows designers to demonstrate how design elements interact and behave in real time. By sharing these prototypes with developers, they can gain a more in-depth understanding of the intended user experience. This visual aid is essential in communicating motion, transitions, and interactivity, which are often hard to capture through static images or mere documentation.
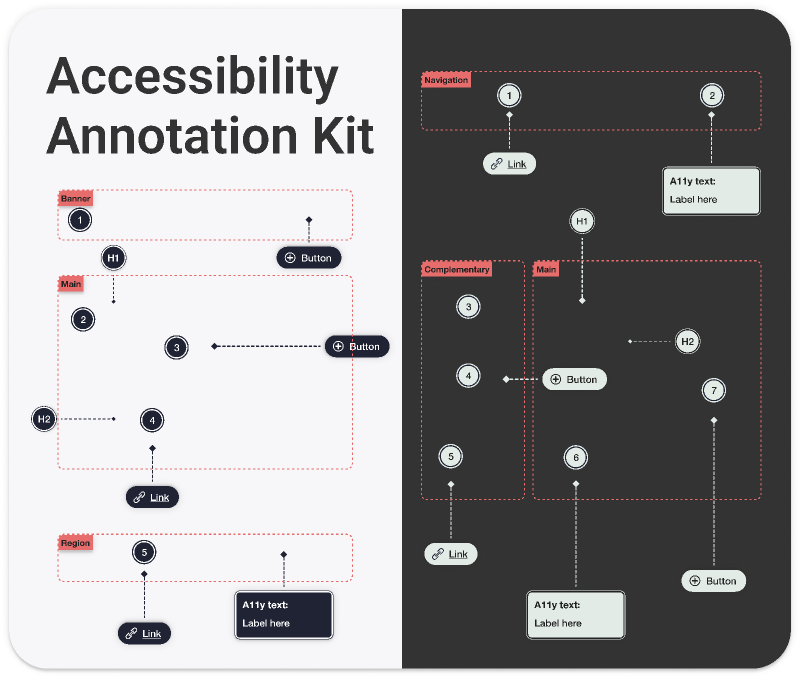
Step 6: Annotations within Figma
To clarify certain design components, designers can use annotations within Figma. Annotations allow designers to add comments and notes directly onto specific parts of the design, offering context or providing details on how a particular feature should function. This ensures no detail is overlooked and reduces the back-and-forth between designers and developers.
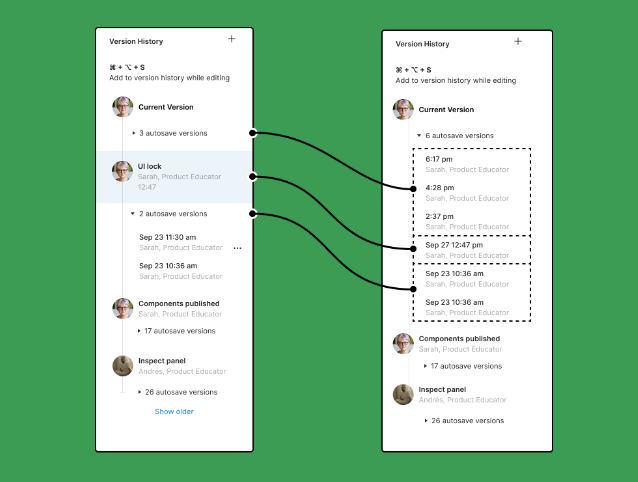
Step 7: Utilizing Version History
One of Figma's standout features is its robust version history capability. Designers and developers can benefit from tracking changes and accessing previous iterations as designs evolve. If any miscommunications or design deviations occur during development, teams can quickly reference earlier versions to align on the intended direction.
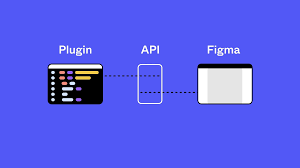
Step 8: Leveraging Figma's API
Advanced teams may wish to utilize Figma's API to automate aspects of the handoff process. The API can extract design data, generate assets dynamically, or even integrate with other tools used in the development process. This can streamline workflows, ensuring a faster and more efficient transition from design to development.
Step 9: Feedback Loops
Post-handoff, it's essential to establish a continuous feedback loop. Developers should feel empowered to offer feedback on design feasibility, while designers should be open to feedback on how designs translate in the development environment. This mutual feedback fosters a collaborative spirit, ensuring the end product is visually appealing and technically sound.
Step 10: Final Review & QA
Before going live, a final review of the implemented design is necessary. Designers and developers should come together for a thorough Quality Assurance (QA) process, checking for consistency, ensuring design fidelity, and validating that interactions function as intended. This collaborative QA session helps catch discrepancies before the final release, ensuring a polished end product.
In conclusion, the Figma developer handoff is not merely about transferring files and data. It's a collaborative journey that involves clear communication, the right tools, and a shared commitment to excellence. By following this comprehensive step-by-step guide, teams can seamlessly bring design visions to life, ensuring that the end product resonates with users and achieves the desired impact.
Unlocking the Secrets of Figma Developer Handoff
Venture into the expansive realm of Figma handoffs with our expertly curated posts. From gaining a holistic understanding of design and development to honing your skills in file organization and embracing best practices, these articles are tailored to guide you through the maze of effective collaboration. Dive in and master the art of seamless handoffs in Figma.
-
Mastering the Figma Developer Handoff: Dive into design, development, Figma's rise, and collaboration tips. Embark on an enlightening journey.
-
Organizing Figma Files for Developer Handoff: Dive into the art of organizing Figma files for effective teamwork, from file organization to naming conventions.
-
Figma Developer Handoff Best Practices: Explore techniques for effective communication within Figma, including annotations, comments, and collaborative workshops.
Share on Facebook
Share on Twitter